
Why Most People Get the Plank Wrong on Their First Try
Walk into any gym and watch people hold planks. Half have their hips sagging toward the floor. The other half have their hips pushed so high they look like they are doing downward dog. Very few actually know how to do plank correctly, and the consequences go beyond looking silly in the mirror.
That is the first thing Richi Singh addresses with new clients. The plank is the simplest movement in the gym and the most universally botched one. People hold their breath, look up at the ceiling, lock their elbows, and wonder why their lower back hurts after thirty seconds.
This guide shows you how to do plank correctly, from the moment your forearms touch the floor to holding a position that builds real core strength. You will learn proper plank form, common mistakes with corrections, how long to hold a plank at your level, and variations that progress without risking injury.
For hands-on coaching around form and progression, the personal fitness training services at Richi Fitness are built around an assessment-first approach.
Why the Plank Is Overlooked
The plank does not look like much. No visible movement, no weight on the bar, no jumping. That is why most people skip past it toward exercises that feel more productive. But the plank builds something no crunch or leg raise can replicate: core stability. When you hold a plank correctly, your deep core muscles, glutes, shoulders, and quadriceps all work together to keep your body rigid.
That transfer shows up in every other lift. A stronger plank means a heavier squat, a cleaner deadlift, a more stable overhead press. For athletes specifically, the sports performance training at Richi Fitness uses plank progressions to build the core stability that holds technique late in a match when fatigue sets in.
The Perfect Plank: Step-by-Step
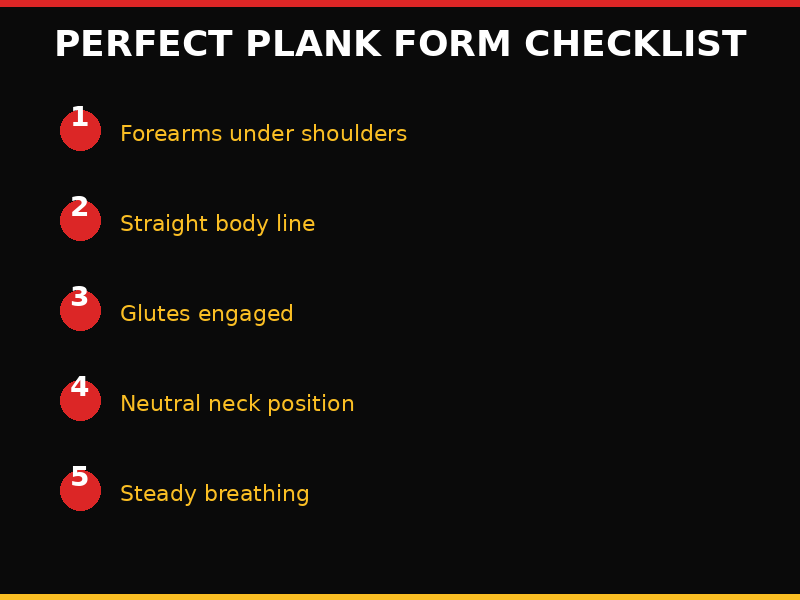
Start on the floor face down. Bend your elbows and place them directly under your shoulders, not out to the sides. Your forearms should be parallel and flat on the floor. Lift your body so only your forearms and toes touch the floor. Your ears, shoulders, hips, and ankles should form one straight line. Not a curve, not an arch, but a line. Check from the side: you should look like a flat board, not a hammock.
Your gaze should be about thirty centimeters in front of your hands on the floor. Not at the ceiling, which strains your neck. Not locked at your elbows, which rounds your upper back. Look down and slightly forward so your neck stays in line with the rest of your spine.
Now the breathing. Most people hold their breath through the entire hold. That creates tension that travels into your shoulders and neck. Breathe in slowly through your nose and out through your mouth. Keep the pattern steady. If you find yourself gasping, the hold is too long for your current level.
The forearm plank is the standard starting position. The straight-arm plank uses straight arms with hands flat on the floor under the shoulders. It places more load on the wrists and shoulder stabilizers, so most people progress to it after holding a solid forearm plank for ninety seconds without sagging. For people with wrist discomfort from desk work, the forearm variation is far more comfortable and removes pressure from the wrist joint.
Common Plank Mistakes That Ruin Your Plank Form
Hips sagging toward the floor
This is the most common mistake and the one most likely to cause lower back pain. When your hips drop, your lower back takes the load your core should be carrying. Squeeze your glutes and pull your belly button toward your spine before you start. Your glutes are the lock that keeps your hips aligned. If they are not engaged, your core cannot hold the line.
Hips pushed up too high
The opposite problem looks better from the front but trains almost nothing. If your body forms an inverted V, you load your shoulders and hamstrings while your core switches off. Lower your hips until your ears, shoulders, hips, and ankles align. You will feel the difference within two seconds.
Holding your breath
Breath holding spikes your blood pressure and turns a controlled core exercise into a tension exercise. Practice breathing before you practice holding. Take five slow breaths in a plank position even if that means dropping to your knees. Build the breathing pattern first, then build the hold time.
Looking up or tucking your chin too hard
Looking up strains your cervical spine. Over-tucking your chin rounds your upper back and disconnects your upper body from your core. Find the middle position: gaze about thirty centimeters ahead, chin slightly tucked but not collapsed. Your neck should feel neutral.
Rushing through the hold with bad form
Thirty seconds of sloppy form teaches your body nothing useful. Twenty seconds of perfect form builds real stability. If you cannot hold proper plank form for your target time, drop to your knees and hold a knee plank with perfect alignment. That is not a regression. That is how you train the right pattern.
Flaring your ribs
When your lower back fatigues, your rib cage tends to flare upward. That breaks the straight line and shifts load into your lower back. Think about pulling your rib cage down toward your hips throughout the hold. Your core stays braced, your lower back stays neutral, and the hold stays effective for longer.
Correcting any one of these mistakes changes how the plank feels and what it trains. For real-time form correction and progressive programming, the small group training sessions in Delhi catch these errors fast.
Plank Variations by Level
Progress through these in order. Each builds on the alignment from the one before it. The key to how to do plank correctly is choosing the variation that matches your current ability, not the one that looks most impressive.
Wall plank – Stand facing a wall, forearms on the wall at shoulder height, step back. This removes almost all core load. Use it if you are brand new to planks.
Knee plank – Set up like a forearm plank but rest your knees on the floor. Your body forms a straight line from shoulders to knees. This roughly halves the core demand.
Forearm plank – Elbows under shoulders, forearms flat, body in one straight line. Master this before progressing. Aim for sixty to ninety seconds of perfect form.
Side plank – Rotate from the forearm plank so one forearm is on the floor and your body faces sideways. Stack your feet. Hold each side for twenty to forty seconds.
Reverse plank – Sit on the floor, place your hands behind you and lift your hips until your body forms a straight line from shoulders to heels. This loads your glutes and hamstrings directly.
Straight-arm plank – Push-up position with arms straight, hands under shoulders. Also the starting position for shoulder taps and leg lifts.
Plank with shoulder taps – From a high plank, lift one hand and tap the opposite shoulder. Keep your hips completely still. If your hips swing, slow the taps down.
Plank with leg lifts – From forearm or high plank, lift one leg a few centimeters, hold two seconds, lower it. Switch legs. Keep hips square throughout.
Richi Fitness builds these progressions into weekly programming so you do not spend too long on any single variation.
How Long Should You Hold a Plank?
Beginner level: fifteen to thirty seconds with perfect form. Start with wall planks or knee planks for two to three sets of fifteen seconds. Build to thirty seconds before moving to the standard forearm plank.
Intermediate level: forty-five to ninety seconds. This is where most people plateau and where form usually starts to break down. If you cannot hold ninety seconds without hip sagging or irregular breathing, count quality instead of time.
Advanced level: two to three minutes. Past three minutes, returns drop sharply. A three-minute plank with perfect form is impressive. A five-minute plank with sagging hips and held breath is not useful training.
The quality over quantity rule applies here more than almost anywhere else in the gym. A forty-five-second plank with a neutral spine and steady breathing trains your core. A two-minute plank with sagging hips trains tolerance for discomfort, not useful strength.
For a training plan that builds plank endurance alongside everything else, the approach at Richi Fitness puts form consistency ahead of time targets in every exercise progression.
Are Planks Good for Weight Loss?
Planks are not a weight loss exercise on their own. They burn very few calories compared to running, cycling, or circuit training. A two-minute plank burns roughly fifteen to twenty calories. That is not nothing, but it is not going to move the needle alone.
What planks do build is the core strength that lets you train harder in every other modality. A stable core lets you squat heavier, deadlift more, sprint faster, and maintain good form through longer sessions. Heavier lifts and longer training burn more calories. In that sense, planks support weight loss indirectly by making your other training more effective and safer.
For anyone focused on fat loss, the priority is consistent training habits around compound movements and structured nutrition. The plank is a support exercise, not the engine. That does not make it optional. A weak core will limit how much load you can safely put through the movements that actually drive fat loss.
Plank Form for Different Body Types
Plank instructions in most guides assume a generic body type. That does not work for everyone, especially in Delhi where desk-based work creates specific challenges.
Wrist mobility issues: Years at a keyboard can limit wrist extension. Pushing through wrist pain during a straight-arm plank is unnecessary stress on a compromised joint. Use the forearm plank instead. It removes wrist extension demand while training the same core muscles.
Shoulder tightness from desk work: Rounded shoulders from sitting all day make the plank harder than it should be. Your shoulders want to round forward, which turns the plank into a shoulder impingement exercise. Before you start, do ten to fifteen band pull-aparts to open up your upper back.
Heavier builds: A longer lever means the core works harder. That is an advantage for building core strength faster with the right progression. Start with wall planks or knee planks and build from there.
Longer limbs: A longer torso means the core works harder to maintain position. Use shorter hold times with perfect form and progress the variation instead of chasing time.
The principle is the same across all body types: proper form with a shorter hold beats a longer hold with compromised form every time. Your core does not care how long you held it. It cares whether the position was stable.

FAQs
How do you perform a plank twist?
Start in a forearm plank with feet slightly wider than hip width for stability. Keep your hips locked and your core braced. Lower one elbow to the floor and rotate your torso so your upper body faces sideways and your free arm reaches toward the ceiling. Your gaze follows your hand. Return to center and repeat on the other side. Move slowly. Each rotation should take two to three seconds. The most common error is letting your hips swing with the rotation. Keep your glutes squeezed throughout to lock your hips. Ten total rotations, five per side, makes a solid working set.
Are planks good for glutes?
Planks engage your glutes isometrically to keep your hips from sagging, but they are not a glute-building exercise. The engagement is not loaded enough to stimulate muscle growth the way squats or hip thrusts do. Stronger glutes from compound movements prevent hip sag during planks. The reverse plank targets glutes more directly as the primary mover.
How often should you plank?
Three to four sessions per week is ideal for most people. The plank is isometric, which means it creates tension without the muscle damage of heavy lifting, so it does not require as much recovery time. A good weekly structure: two days of standard plank holds and variations, one day of dynamic plank work like twists or shoulder taps, and one rest or active recovery day. Avoid heavy lower body training immediately before a plank session, since a fatigued core will compromise your form.
Are planks good for weight loss?
Planks are not a weight loss exercise on their own. They burn very few calories during the hold. What they do is build core stability that lets you train harder. A strong core lets you squat heavier and maintain good form. In that sense, planks support weight loss indirectly.
Can I do planks if I have lower back pain?
If your lower back hurts during a plank, the most likely cause is hip sagging, which puts load onto your spine instead of your core. Drop to your knees or a wall plank and focus entirely on keeping your hips aligned. If pain persists even with perfect form on a knee plank, see a physiotherapist before continuing. Planks should strengthen your core, not aggravate your back.
Should I do planks before or after my workout?
Planks work best as either a warm-up activation drill or as accessory work at the end. A thirty-second plank before heavy squats or deadlifts activates your core. Avoid long plank holds before heavy compound lifts, as core fatigue can compromise your technique.
If you want a training plan that integrates core stability work, reach out to Richi Fitness. Call or WhatsApp to book a free consultation session.
Related: How to Do a Plank Correctly: Common Mist
Related: Best Workout Split for Beginners: What A
Related: Bodybuilding Trainer in Delhi: How to Ch